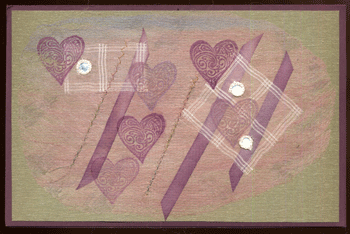
Silk Fusion
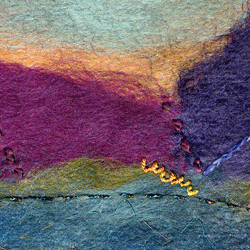 Photo by Karen Selk
Silk Fusion, also known as Silk Paper, is an exciting new creative process.
By Karen Selk
This unique method bonds silk fibers into a lustrous kind of "felt" which can be gossamer and transparent or thick and opaque as leather. Because the fibers are unspun, silk's rich lustre and texture are captured.
Silk fusion is a perfect canvas for hand or machine stitching, printing, stamping, origami, quilting, jewellery, wearable art, book coverings, collage and on and on. To help you get started, there are complete instructions for making silk fusion on our web site. And we have developed an award–winning instructional dvd as well as a starter kit.
Silk is comprised of two proteins. Two "strands" of fibroin are coated with the second protein, sericin, as it is extruded from the silkworm's body. This semi-liquid fiber is as smooth as glass. Unlike wool fibers, there are no protruding scales that will cling to each other when agitated with soap and water to make felt. So a little help is employed to fuse the lustrous silk fibers together.
Silk Fusion Origins
To our knowledge, the origins of this concept have been passed along by a felter in Holland, Inge Evers, who incorporated silk fiber into her wool felt by using wallpaper paste in 1989. Nancy Ballesteros of Perth, Australia, has promoted and passed on the technique to many more who are creatively using it in a myriad of ways. There IS something new under the sun and it is fast and fun.
The first time I saw the silk "felt" fabricated by human hands, I was astonished at its similarity to what I've seen in Korea, China, and on my kitchen cabinet. Many summers ago while raising silkworms, I had an escapee. While the other caterpillars happily stayed in their own 1" cube to spin their cocoon, one fellow wandered. He got stuck under his spinning "cage" on the cabinet. Weeks later, when clearing away the cages for next year's crop, I discovered the hard pupa shell sitting next to a 1 ½" square of flat silk. There was not enough room for the caterpillar to move its head in a figure of eight while spinning its metamorphosis home. All it could do was move its head back and forth to create a flat piece of silk fiber "glued" together with sericin.
We saw the "felt" again when visiting a village in Guizhou Province, China. They "trick" the silk worms into making flat "felt" instead of a cocoon. The unique costumes made by the women of this village are renowned for their exquisite embroidery and appliqué incorporating the silkworm felt.
Silk Fusion Materials
By Karen Selk
Treenway Silks - Hand-dyed Sliver
Salt Spring Island - Shop
A1 Tussah Sliver hand-painted in 24 different variegated colorways.
All 82 Treenway Silks Silvers- Shop
View Treenway Silks complete collection of 82 slivers - natural un-dyed, solid colors and varigated.
Fiber Creative Packs - Shop
Six color sets of creative fibers.
Fiber
Silk roving or sliver is used to make the fusion. The fiber is obtained from cocoons that are not usable for making reeled yarn and the "waste" left behind after the reeling process. This silk is degummed, washed so all the natural, gummy sericin is removed. The tangled mass of fiber is cut into more manageable lengths of approximately 12". Carding begins to remove all the short, lack-lustre fibers and lay the rest parallel. Combing is the next process which continues to remove short strands and combs the remainder parallel leaving the fiber shimmery and soft. The silk to be made into fusion can be white from the Bombyx mori caterpillar or eri caterpillar as well as honey coloured from the semi-wild tussah caterpillar or muga caterpillar. Any of these rovings can be dyed before fusion.
Two sheets of 3 layers, measuring 12" x 16" will require approx. 50g of fiber.
Adhesive
There are many types of textile adhesives available. Each has its own unique formula. We have experimented with more than a dozen of them. Each gives the fusion a different look and feel. We have found Jo Sonja's Textile Medium & Gloss Varnish to be the most satisfactory.
Textile Medium.
The finish is waterproof and can be hand washed using a damp soapy cloth or sponge. The silk is flexible, lustrous and excellent for sewing. It can be used for wearable art within reason. The medium is applied at 100% strength and must be heat set after it is dry for proper bonding. The manufacturer suggests two minutes at 250°F. Use a cloth or tissue paper between the iron and fusion when heat setting. If too little medium is used, or the fibers are not wetted through properly, the surface may be fuzzy or the layers may bubble and/or separate.
Gloss Varnish.
The finish is water repellent. Fusion treated with this medium is crisp, like paper, but pliable enough for sculpting jewellery, book covers, hand or machine stitching, and mixed media. This medium can be mixed at 60% gloss with 40% water. Experiment to suit your needs, for softer or stiffer finished products. If too little gloss is used or the fibers are not wetted through properly, the fusion surface may appear hairy. More gloss may be brushed on or applied with a spray bottle after it is dried. If too much gloss is used the surface becomes shiny and fake looking. For sculpting it should be used at 100% strength.
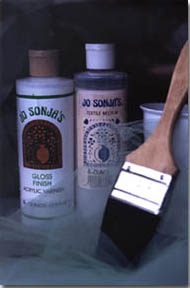 Photo by Karen Selk
Tools Required
By Karen Selk
- Apron
- Mild Soap- to wet out the silk
- Clothesline- outside or prepared inside for dripping underneath
- Paint Brush used to apply soapy water and adhesive to the fusion
- Clothespins
- fiberglass Screen (holds silk fibers)
- Dishpan- to transport wet silk
- Textile Adhesive
- Plastic- used to cover work area
- Tussah Silk fiber
- Plastic Cup- large enough to pour in medium and insert brush
- Dyed Silk fiber.
How To Do Silk Fusion - Procedure
By Karen Selk
1) Layout the silk sliver--
| Prepare the work area: | You can work directly on most table or counter tops if the surface is wiped clean immediately after applying the adhesive. Cover the work table with plastic if you are unsure. Wear an apron, as the adhesive stains clothing. Place a piece of screen on the table a little bigger than the desired piece of fusion. |
| Laying out the fiber: |
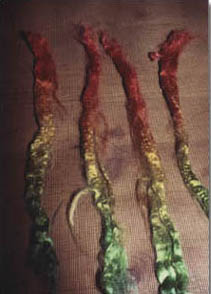 Photo by Karen Selk Photo by Karen SelkPull off (never cut) a length of fiber, 8"–12". The silk fibers are long so hold your hands approximately 8" apart so the fibers have room to pull apart. Separate the 8"–12" piece lengthwise into 3 or 4 workable segments (about the diameter of a pencil). If using dyed top, make sure the end is fanned out and fluffy. The dying process often causes the fibers to stick together. This will not be necessary with the undyed fibers. It automatically fluffs at the pulled ends. |
| Prepare the silk to be laid on the screen.: |
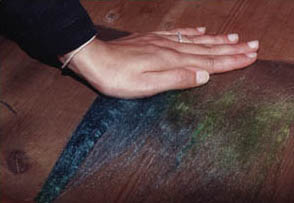 Photo by Karen Selk Photo by Karen SelkLay the 8-12" fiber horizontally across the top of the screen. Use the palm of your left hand to hold down the end of the silk on the upper left corner of the screen. Use your right hand to pull apart the silk, leaving a length of fiber behind that is approximately 3-4" long by ½" to 1½" wide. Take the remaining 8-12" piece of fiber and place it underneath the first piece that was laid down. |
| Layout downward and then up: |
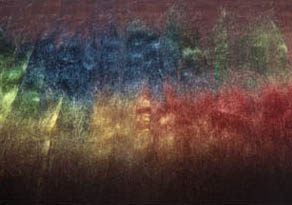 Photo by Karen Selk Photo by Karen SelkContinue moving downwards creating more 3–4" strips, until you've reached the bottom left corner. Each segment of silk should overlap its neighbour in all directions, so as not to see the table underneath.Proceed upwards in the same manner, creating a new column. This new column should overlap the previous column with 1½" to 2½" of wispy fiber. Continue making more silk columns until you've reached the desired dimensions. Proceed upwards in the same manner, creating a new column. This new column should overlap the previous column with 1½" to 2½" of wispy fiber. Continue making more silk columns until you've reached the desired dimensions. Note: You will have to replace your 8-12" fiber piece after you've laid down a few strips. |
| Consecutive layers: |
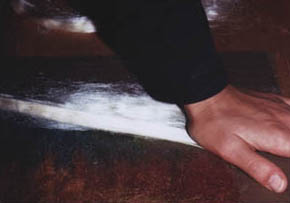 Photo by Karen Selk Photo by Karen SelkA second, third, and even forth layer of silk can be applied. The desired thickness of the fusion will be dependent on the final use. Pieces that will be manipulated or sewn will require more than one layer. If the fusion only has two layers, the second one will be laid down on top parallel to the first layer. Many of the projects use three layers. In this case, the second layer is laid perpendicular to the first and the third layers. The middle layer is totally covered by the top and bottom. The natural colour tussah silk is less costly than the dyed fiber and more practical to use as the inside and middle layer. |
| Place the top screen: | Place another piece of screen over the silk, creating a sandwich after all the desired layers have been applied. |
| Success tips: | Maximum Sheen: To obtain maximum sheen, the fibers should be laid out as smoothly and as parallel as possible. Static electricity, or air movement from a fan or the wind can be troublesome. Consistency, Thickness and Strength: Practice and patience is needed to obtain an even thickness. A wider strip of fiber used on one area will create a thicker spot. Three layers, with the middle layer laid down at right angles to the top and bottom layer, produce a piece flexible enough to manipulate and strong enough to withstand the treatment. |
2) Wetting out the silk layers--
| Thoroughly wet all layers: |
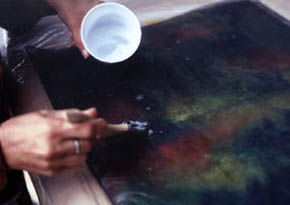 Photo by Karen Selk Photo by Karen SelkIt is imperative the silk fibers are wetted thoroughly so they accept the adhesive. Mild soap or orvus paste should be added to the water with a ratio of 1 tsp. soap per 4 cups of water. Apply the solution by brushing it through the screen using the paintbrush. Turn the silken sandwich over and repeat on the other side. It takes more water and time to thoroughly penetrate the fibers than you might anticipate. The screen and silk sandwich changes to a darker colour and becomes very flat with no air pockets when the water has soaked through. Use the pressure of your hands to help with the penetration. Allow to dry. If possible, let this wet sandwich sit for 2–4 hours as the water will continue to soak through the fiber. Wipe the excess water with a sponge. Don't be concerned about a little lather. |
3) Apply the adhesive--
| Pour adhesive: |
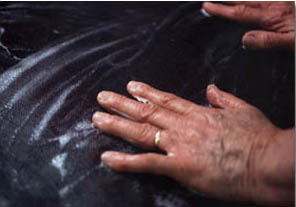 Photo by Karen Selk Photo by Karen SelkPour some adhesive into a plastic cup that will not have to be used for anything else. Paint it evenly and thoroughly onto both sides of the wetted fusion creating an even, milky look. Before setting it to dry, lightly push all the loose ends around the piece of fusion into a "selvage". This makes it much easier to peel the screen off later. Loose fibers tend to stick to the screen, causing a potential problem of having the fusion release in layers. Move the sandwiched fusion off the plastic into a dishpan to transport it to the clothesline. This will prevent getting the sticky adhesive on the floor or furniture; it stains. Hang to dry in the shade. Direct sunlight is destructive to silk. Drying times vary according to the thickness and humidity. Eight to ten hours drying time is usually enough. When the fusion is completely dry, slowly peel the screen away. If it is not completely dry it will be difficult to separate from the screen. |
4) Set the adhesive--
| Iron: | The piece of fusion must be ironed, using a silk setting to set Jo Sonja's Textile Medium. Ironing also helps flatten or remove creases. Always use a press cloth when ironing fusion to prevent gumming up the iron surface. It is not necessary to heat set Gloss Varnish; however, ironing does not harm it. |
Troubleshooting Silk Fusion - Problems and Solutions
By Karen Selk
Care of the Screen
- Wash the screen with warm soapy water and let it drip dry.
- The screen becomes wrinkled with subsequent use.
- It can be ironed flat again. Remember to use a press cloth.
- The screen becomes "sticky" and difficult to pull apart after a number of uses. This is dependant on how much adhesive one uses and how well screens are washed. A set of screens can usually be used 3 or 4 times before it is necessary to discard. It is time to throw it away when it becomes troublesome to pull apart.
Fuzzy Surface
There are a few reasons this occurs:
- The fusion wasn't completely dry before peeling off the screen
- There wasn't enough adhesive applied
- The project required too much manipulation for the type of adhesive
Solution: Applying more adhesive to the finished project may solve this problem. It is best to spray it on using a mister.
Difficulty Removing the Screen
Some of the reasons this may happen:
- Trying to remove the screen before the fusion is completely dry.
Solution: Ensure the fibers are totally dry before removing the screen. - Not easy to cleanly pull the screen apart if the silk fibers are very " feathery" at the edges.
Solution:Make sure to gather the loose fibers around the edges of the fusion before hanging to dry. - Too much adhesive was applied and made the screen sticky.
Solution: PATIENCE is required to pull the screen away and keep the fusion intact.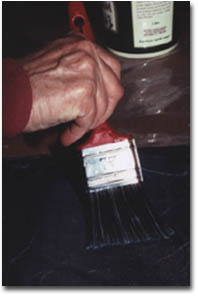 Photo by Karen Selk
 - The screen has been used too much and has retained too much adhesive.
Solution:Time to retire that screen.
Layers of Silk Separate
Was water saturated.
- Separation of fibers occurs if they were not thoroughly wetted, which means the adhesive did not penetrate. It is imperative to have the fibers completely wetted through.
Solution: It may help to let the wetted fibers sit for a few hours before applying the adhesive.
Solution: Decorative stitching looks great, adds to the design, and holds the layers together. This is a most creative solution..
Ideas & Embellishments
By Karen Selk
Embedding
Threads, ribbons, bits of cloth, feathers and even flower petals can be fused into the silk. It works best to lay a fine film of silk fiber over the pieces you want embedded. This will ensure it is held into the silk.
Incorporating other Silk fibers in Silk Fusion
-
Hankies
-
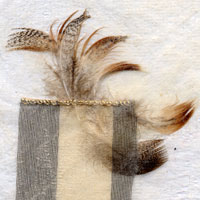
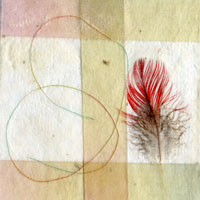
These squares are formed by stretching cocoons and piling one on top of the other. When the hankies are stretched, a natural selvedge is formed. You can peel off a very thin or a thicker hankie depending on your purposes.
Hankies are a perfect show case for trapping things that do not embed as easily as silk, e.g. feathers, sequence, etc. They look beautiful hanging in windows to show off the treasures trapped between the hankies.
Hankies by Karen Selk -
Silk Carrier Rods
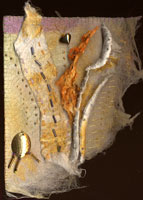
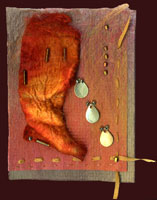
As the cocoon is unraveled into skein form, silk filaments get wound around the machinery. This silk, with sericin (natural silk gum) still in it, is then slit and removed. The rods are 5–5½ inches long when whole and unscrunched. There are also some short pieces and partially wound cocoons in the mix.
Silk Carrier Rods are wonderfully textural for stitching, fusion and any application needing depth. They can be pressed flat or pulled apart to reveal the interesting criss-cross of the fibers.
Silk Carrier Rods by Karen Selk-
Degummed Throwsters Silk
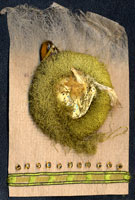
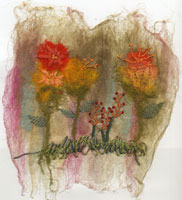
This is a by-product of unraveling the cocoon to make yarn. When things go wrong in the throwing mill and fibers tangle around the machine or are otherwise unable to be used for finished yarn, they become thrown silk waste.
It is high quality, long silk fiber with a variety of long curly strands, kinky strands and others in between. It is degummed (the stiff sericin removed), so it is soft. The throwsters waste adds great texture to silk fusion.
Degummed Throwsters Silk by Sue Earle (left) and Karen Selk (right)
-
Natural Silk in Sericin
-
These strands are formed in a similar way to throwsters waste. It is in long straight strands to short kinky strands. It is in sericin, so it is stiff. It adds great texture and interest to silk fusion.
-
Carded Cocoon Strippings
-
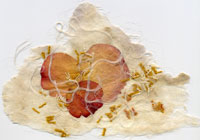
These fibers are taken from the first silk extruded by the silkworm. It looks like slightly disorganized puffs of carded fiber which is matte in appearance. It is only partially degummed. This means it can stiffen when it gets wet. It adds variance to the smooth surface of silk roving.
Carded Silk Cocoon Strippings by Karen Selk -
Tussah Noil
-
Short fibers with little nubby bits are left after the carding and combing of the higher quality rovings. It fuses beautifully on its own or added to the rovings gives a nice texture.
-
Cocoons
-
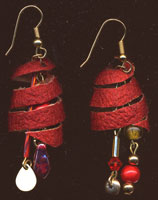

Cocoons are spun by the silkworm as a home for metamorphsis in which to transfrom into a moth. Silk is comprised of two proteins: fibrosin and sericin. The sericin is a glue–like substance which holds the fibers of the cocoon together and makes the cocoon feel hard.
Cocoons are the source of all silk yarns and fibers and fun to play with.
Silk Cocoon Earrings by Teri Shaw -
Multicolored Silk fiber Blend
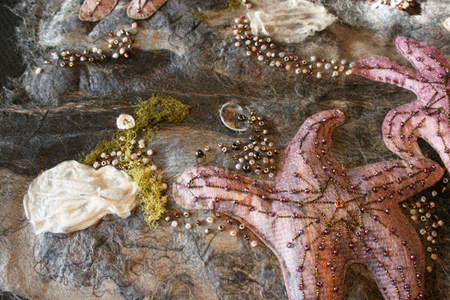
A combination of short silk fibers in a combination of greys and browns is mixed with colourful silk threads. The colourful thread accents lend great texture and interest, particularly fusion landscapes.
Silk fusion by Karen Selk-
Sculpting with Fusion
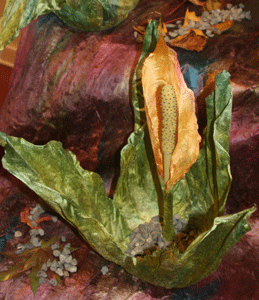
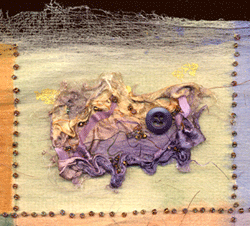
Use Acrylic Gloss at 100% strength and apply to both sides of the fusion. Remove the screen and return the fusion to the plastic.
The wet silk is extremely strong; there is no need to worry about it falling apart. With your fingers, manipulate the silk into any shape you desire or drape it over a mold; leave to dry. It will take much longer to dry than flat pieces in a screen.
Silk fusion sculptures by Karen Selk
All of these unusual silk fibers are available in natural and many are available dyed.
Suggestions
- Appliqué for Clothing and Other Projects
- Gift Tags
- Matting for Pictures
- Bags
- Greeting Cards
- Mobiles
- Boxes
- Hats
- Picture Frames
- Business Card Case
- Jewellery- Pins, Earrings, Pendants
- Stuffed Animals
- Cushion Covers
- Journal, Book or Album Cover
- Vessels
- Envelopes
- Lamp Shade
- Vests
- Eyeglass Case
- Masks
- ETC....
- You are only limited to your imagination!
Embellishment Ideas
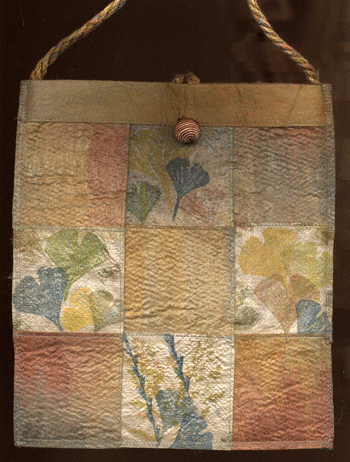
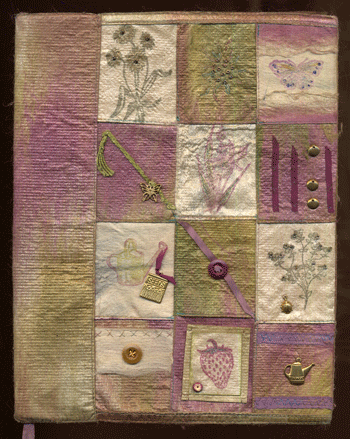
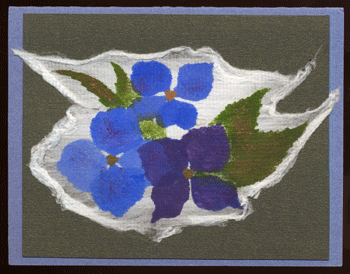
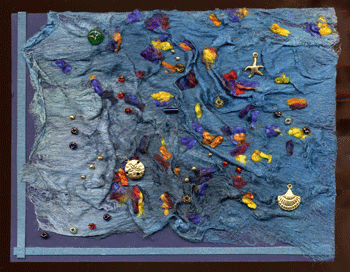
We have applied: ribbon, embroidery, silk yarn, hand embroidery, machine embroidery, beadwork, tassels, cords, bows, and sequins onto the fusion with great fun and success. We have also painted, nature printed, rubber stamped and stencilled upon our fusion pieces with beautiful results.
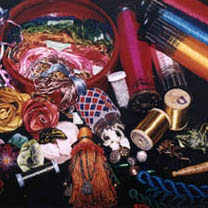
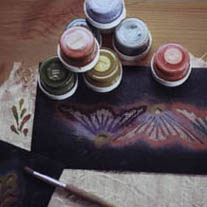
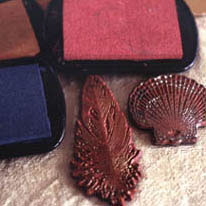
All works by Karen Selk.
- Patchwork silk fusion bag with nature stamps
- Patchwork silk fusion journal cover with stamping, beading, appliqué
- Stencilling on silk hankie
- Scrunched silk fusion with embedded silk threads and added beads and charms
- Silk fusion with embedded lace and ribbon then stamped.
